

It seems hitting the high street this year is all about having a pair of ripped jeans in your closet. I know that it is easy and simple to go pick a pair up from your local Topshop or Primark even, but there is a way to save some pennies and create this look without having to leave your home.
I have recently graduated and I have no money to go buy myself some key fashion pieces that I will need this summer, so I am all about saving to go towards travelling or paying off loan more likely :(
So here it is my step by step guide too customise your very own ripped jeans.
What you will need;
1- Unpicker
1- Pair of old scissors or fabric sheers
1- Pemistone (optional)
1-Bit of sandpaper(optional)
1- Chalk or fabric marker
1- Pair of old jeans!!- Most important of all!!


Depending on the look you want choosing the jean colour and style does matter, if you have an old pair of jeans my advice is just to get creative and experiment and if you don't like it, you haven't ruined your favourite jeans. I particularly like the loose fit style usually they go by the name of boyfriend jean, and I like lighter colour denims for the summer time. If you have a dark style of jean and want lighter, no problem- bleach is your best friend under supervision- in a well ventilated area you can bleach denim, it slowly lightens and if you keep an eye on the process you can wash it off whenever you have the desired colour. It can burn your hands so make sure to wear protective gear and thoroughly wash the denim after. Also you can bleach before or after the ripping begins it really doesn't matter. I have found it is best done before but make sure it has been washed a lot to rinse any of the leftover bleach, it will feel crispy so it might be even an idea to put it through the washer machine and dryer using conditioner.
So Lets Begin!
First do some research on pacific style that you wish to achieve. Here are some of my favourites!! Also inspiration of how to stylise your new jeans!!

Also decide whether you want lots of rips or just subtle design- after wear it will tear more so that is something to consider. I Warn You know your jeans my loose shape or even tighten!

The next thing I did was pull a couple of threads with the unpicker to mark where I wanted to start, to get the best result is to be careful and have some knowledge of Denim fabric structure, its not hard to figure this out.
You want to start unpicking the warp thread which when looking at your trousers its the threads that are running vertically.

This gives less support to the denim but will create this laddering effect once you start pulling out threads from ether side of the whole created from the unpicker.
Though this method is a bit of a faff there are some other great techniques I found to have similarly good effects to the denim.

I found some Tweezers that also ended up being involved in slowly pulling and manipulating threads, I found this to work well as using my fingers became quite painful and hard as I wanted to work in a smaller area.
I was also cutting any threads that were becoming too long as its something that could cause the denim to start unravelling when I wear them.- Under supervision you could burn some of the ends as this can give a nice rustic look swell as preventing unravelling.
By now I have also created some bigger holes that also made it easier to create laddering/graze effect to the denim, gently pulling the loose threads can also make it look more authentic.

This is what mine started too look like, although I was going for a subtle look with this particular pair of jeans I wanted it to look more distressed so I used the penistone and grater and rubbed them against the fabric, you could use the sand paper. But I found results took a lot of time, I am impatient and like a quick result, so I intervened once again.

I bought this razor last year from boots for £5.99 I soon found out it wasn't the best and haven't used it since. It has an electric bikini trimmer which again isn't too good but i saw on other tutorials people had used razors so I gave it a try. It worked, with some effort it gave holes and a distressed look to my jeans. If you are to use a razor please be careful as it is sharp.
The final step is to repeat to the other side it can follow the same pattern or be completely different and also iff you desire the back can be ripped the same way. As a design feature it may be worth distressing the pockets and the hem of the jeans for the more authentic look.

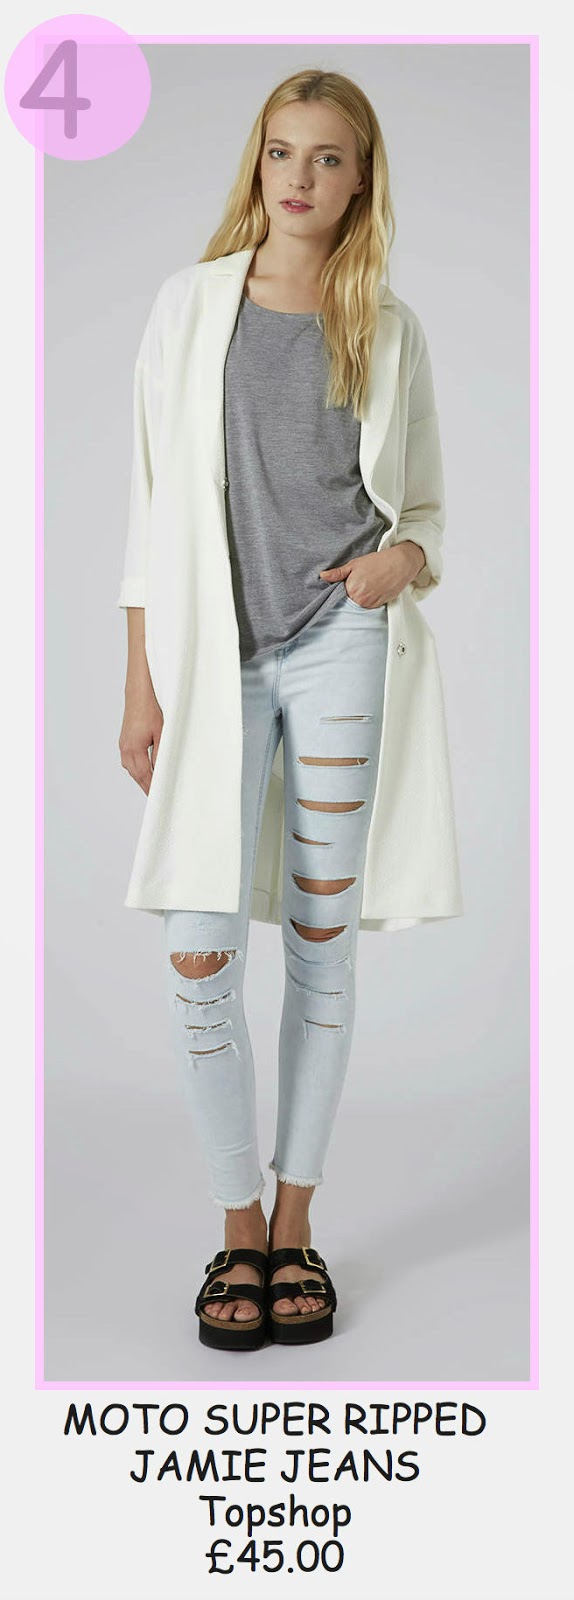
If you found it wasn't to your desire or have some cash to spend here are my top 10 ripped jeans from your local high street stores/ online. :)


Hope you liked it!

No comments:
Post a Comment