Friday, 22 August 2014

Interview Time!


I have been To a Few Interviews already and have more soon :s But I am young and want to look professional but not like I am dressing as if i'm aged 40!
* If your going for retail it might be worth wearing something they sell so it looks like you appreciate and follow the brand/company.

To help I have selected a selection of looks from different stores.

Simple Dress Suit in a pop pink makes it young and fresh, I chose to style it with Pink and whites to make it brighter and hopefully give a good impression to the interviewer! Sandals weren't my first choice but they are white and it could be a choice if it was summer.

Pink Wrap Crepe Dress £35.00, Petite Ivory Waterfall Jacket £35.00, Pale Pink Large Tab Tote Bag £28.00, Head Over Heels Hershie White Sandal£39.00
Total Value: £137


A classic Tailored look with a new fresh Urban vibe I would style it with a simple leather tote bag to make the full look professional!


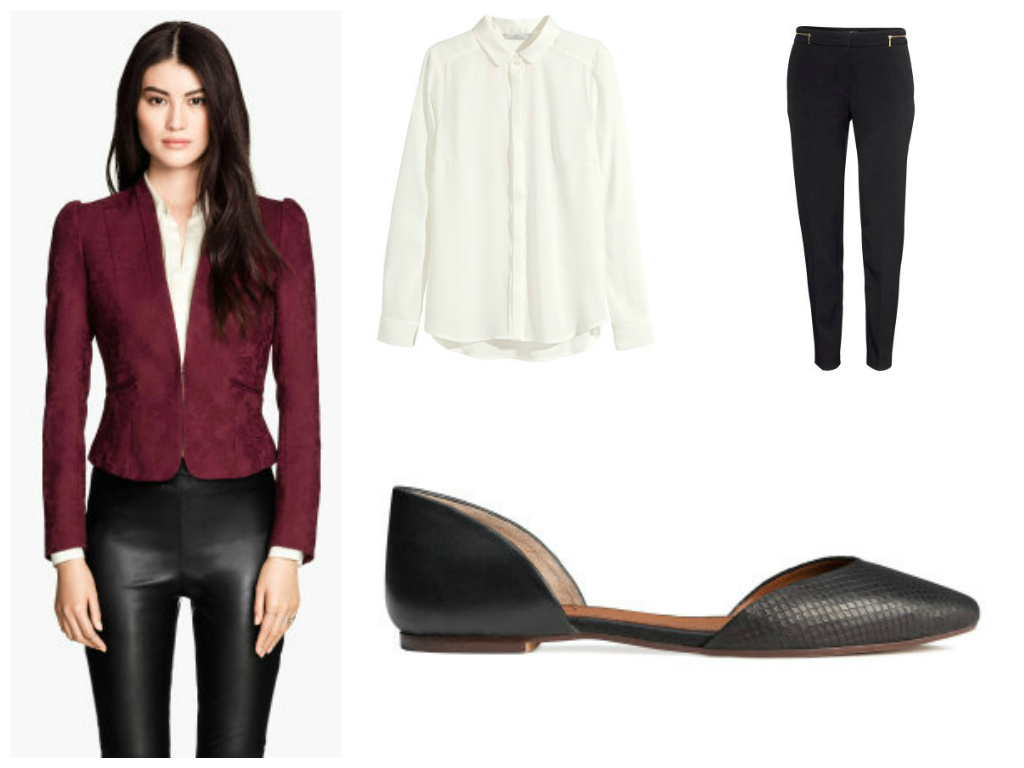
Jacquard-weave jacket £29.99, Figure-fit blouse£14.99, Leather shoes£29.9,8 Slacks £14.99 

Total value: £89.18

Layered Lady of look, I wanted to style a look maybe for the autumn where you will need a jumper, very minimalist colours but with the floral dress under neath it gives it something special and it will act as a pencil skirt.

Grey Slouch Curve Hem Crop Jumper £14.99, White Short Sleeve Plain Shirt £12.99, White Floral Pastel Bodycon Dress £12.00, Grey Double Flap Snakeskin Panel Satchel £17.99, Grey Pointed Block Heels £39.99

Overall value: £97.96 


 This is probably something I would wear to interview, that shirt could go with a pencil skirt or shorts or joggers. Duster Coats are really in shops and I would pop one over the top just to keep me warm, you can get some smart ones to the one bellow is more kaftan/kimono but styles correctly I think would make a great impression!
Mila Stripe Crop Boxy Shirt £14.00, Mallory Longline Kimono £22.00, Alice Woven Crepe Tailored Luxe Joggers £25.00, Ashleigh Brogue Detail Lace Up Flat Shoe £25.00. 

Overall Value: £86.00


I hope this inspires you, don't be scared of colour or something you wouldn't usually wear!

Friday, 18 July 2014

D.I.Y. Textile Owl

Hello Internet! 


April here, to show you how to create your very own decorative owl!


Here I have created an easy step by step tutorial for you guys to follow

Tutorial

Estimated making time: 1.5 hours 
 ( this was me taking my time, simultaneously watching the dan and phil show on radio one, so I was slightly distracted ;D)

(lighting in my room is awful, sorry)

What You Will Need;

(btw, all these products can be found in your local haberdashery store and/or hobby craft)

2x black buttons
2x white thick felt ‘eyes’
1x cream thick felt ‘face’
1x brown triangle
2x grey thick ‘bodies’
2x fabric ‘wings’
2x thick felt ‘wings
1x fabric tummy
1x felt heart
1x handful of stuffing
not forgetting the thread

Obviously you can change the colours of any of the materials needed to create your owl, (its down to personal taste) I just used what fabric I had left in my scrap fabric box. You may also need a hot glue gun/ pritt stick, although I have created the whole project through hand stitching.

Step One- The Body


You will need to blanket stitch the sides of the owl together leaving a hole to pop in the stuffing, alternatively you could stuff with potpourri if you want a beautiful smelling owl. 
You then obviously finish stitching up.

Step Two- The Wings and Eyes


To make the wings, put you fabric wing and felt wing shapes together, and blanket stitch around them. Follow this step again for the other wing too.


For the eyes, sew the button on to the white felt circle to make the eye, and then make stitches, like spokes of a wheel from the button around the edge of the white felt circle. This I feel makes the eyes more owl like. Follow this step again for the second eye


This is a front and back view of what your little owl should look like now J

Step 3 –Putting The Face Together


For this step you will need to either hot glue gun the eyes to the face shape or sew it, like I have. Then hand stitch the triangle shape to the face as shown creating its mouth.

Step 4- Putting It All Together


 For this part you can stick together your owl with either a pritt stick or hot glue gun, however you can also hand stitch, which I did once I discovered my glue had

Dried out.
I used a basic stitch to put together the tummy and the body of the owl
(If you know you are going to be hand stitching the whole project stitch the tummy on the felt body before you stitch together the front and back shapes creating the body)


 So, once you have finished gluing/tacking/stitching your owl together he should look like this! 
I also added a tie, so I can hang him from my wardrobe handle.


This is the finished project! Hopefully you have an amazingly cute little fellow that you can use to decorate your room with!
Personally I have used my owl to hang off my ( very dull looking ) 
wardrobe handle 
(just to spice things up!)

You however, could use him as a decorative potpourri holder to pop in your sock drawer, decorate your room with or simply give as a beautiful handmade gift.
Toodlepip xx


Too find more of my social media ramblings, check me out!

Twitter | Facebook | Bloglovin' | Pinterest | Tumblr | Instagram

BLOG TEMPLATE BY DESIGNER BLOGS